
How to Set Up Karing: A Step-by-Step Guide



Karing is an app for connecting to proxy and VPN servers. It understands Clash, V2ray, Sing-box, and Shadowsocks configurations as well as regular subscriptions, and it runs on phones, tablets, computers, and even Apple TV.
Many people download Karing VPN to connect a ready-made subscription from their provider. But Karing also supports another scenario: you can manually add a proxy server — for example, one you rented separately, without a subscription.
In this guide, we’ll walk through the whole process: where to download Karing, how to install it, how to set it up, and how to connect a proxy or VPN to it.

Need a reliable proxy for Karing?
Connect NodeMaven ISP proxies with stable IPs and targeted locations.
What Karing is
Karing is a client, not a server provider. On its own, it doesn’t give you a single IP address. It’s built to take connection data (a configuration link, a subscription, or proxy server parameters) and turn it into a working connection on your device.
Under the hood, Karing runs on the sing-box engine, so it supports most popular protocols: Shadowsocks, VMess, VLESS, Trojan, Hysteria2, WireGuard, SOCKS, and HTTP. It’s specifically the support for HTTP and SOCKS that makes Karing convenient for connecting proxies, which we’ll cover below.
How to download Karing
You should only download the app from official sources — the developer’s website or official app stores. That way you won’t end up with a fake build.
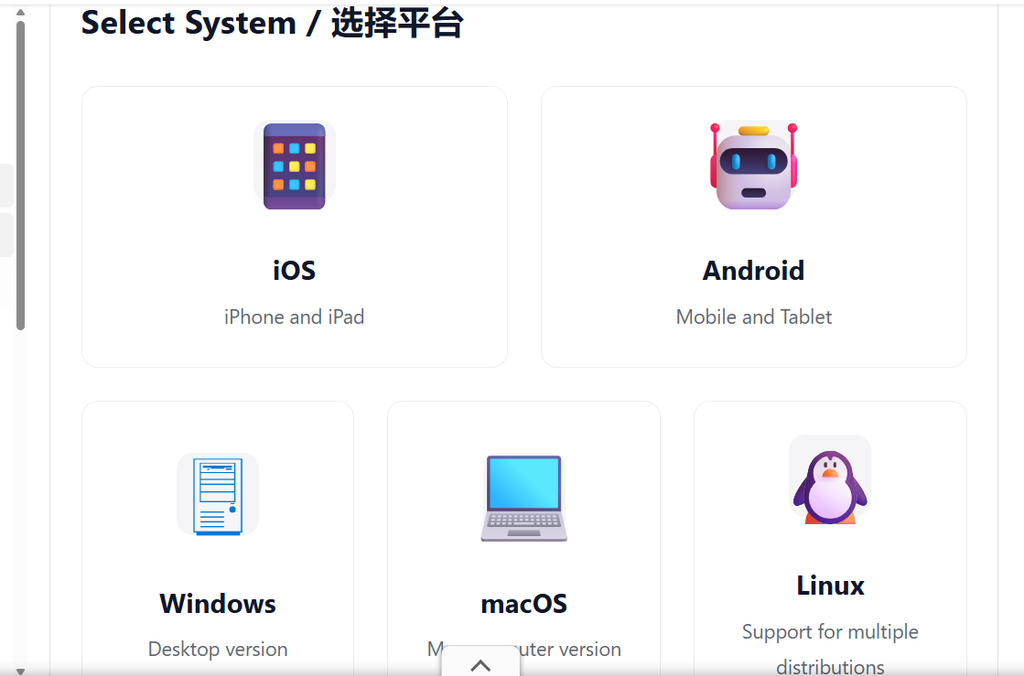
Official website: karing.app. The download page has links for all platforms.
Where to find Karing on different devices:
| Platform | Where to download |
| Android | Official website, GitHub releases, or APKPure |
| iOS / iPadOS | App Store (search: karing vpn) |
| Windows | Installer or zip archive from the official website |
| macOS | Official website or the brew install karing command |
| Linux | deb or rpm package from the official website |
| Apple TV | App Store, paired with the mobile app |
Karing’s system requirements are simple: iOS 15+, Android 8+, Windows 10+, macOS 12+. That’s not an issue for most modern devices.
Installing Karing
On phones, the process is straightforward: download the file or open the App Store page — tap “Install” — wait for the download to finish.
On Windows, after downloading the installer, you may see a Windows Defender warning. This is a standard reaction to a new, lesser-known app, not a sign of an actual problem. Click “More info” and select “Run anyway.”
On Android, the manufacturer’s built-in protection can sometimes get in the way — for example, on Xiaomi devices. If installation doesn’t go through, try temporarily turning on airplane mode and disabling enhanced protection in the security settings, install the app, then restore your settings afterward.
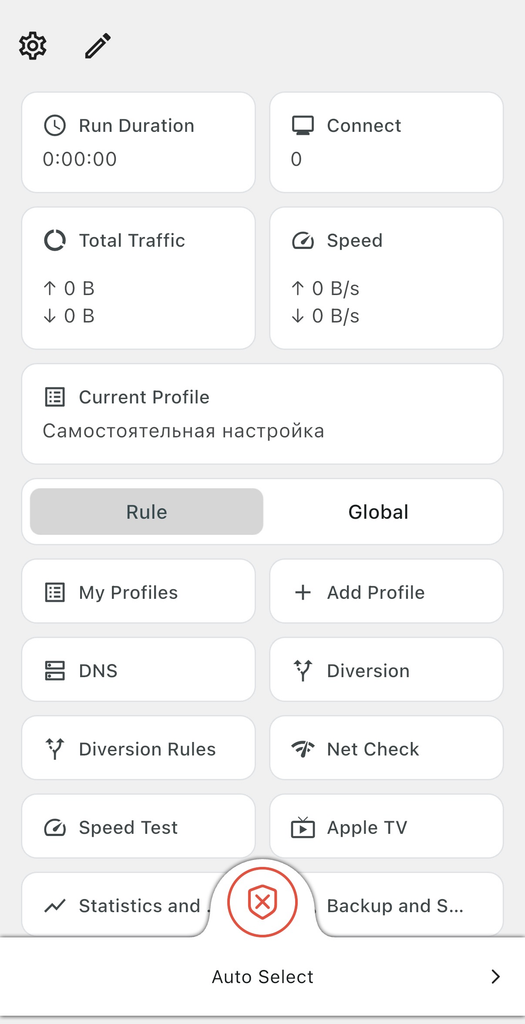
Once installed, open Karing — you’ll see the main screen with a connect button and a server selection field. It’s empty for now, because there are no servers yet.
How to set up Karing
Before getting into how to set up Karing, it’s worth taking a quick look at the interface layout. At the bottom of the main screen is the connect button and the name of the current server. Depending on the platform, the menu may sit at the top or on the side.
To add a configuration, open Add Profile. Several options are available here:
- Add a link or paste configuration content;
- Import data from the clipboard;
- Import a local file;
- Scan a QR code;
- Create a custom profile via Custom.
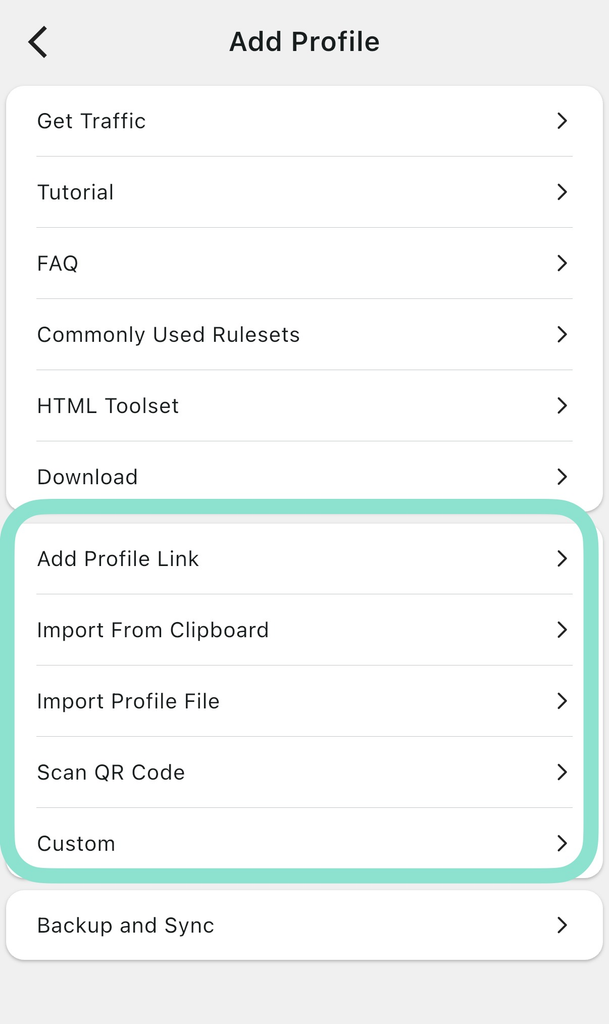
If you already have a ready-made subscription or configuration link, use Add Profile Link. This section is meant for links and content in supported configuration formats.
If instead you have a regular proxy with separate parameters — such as an address, port, username, and password — use Custom.
Important: in some versions of Karing, the Custom section may not work correctly. For example, the app may crash when you try to create a profile. If that happens, use the alternative method via a YAML file. It’s still worth trying Custom first, since it may work fine in a different version of the app.
Looking for a stable Karing connection?
Use NodeMaven ISP proxies with dedicated IPs and unlimited bandwidth.
How to add a proxy to Karing
If what you have isn’t a subscription but a regular proxy server with an address, port, username, and password, you shouldn’t add it the way you’d add a regular web link through Add Profile Link.
For a standalone proxy, there are two options.
Method 1: Add a proxy via Custom
This is the first method to try.
- Open Add Profile.
- Select Custom.
- Give the profile a name.
- Add the server.
- Choose the proxy type, for example SOCKS5.
- Enter the proxy parameters:
- Host / Server — the proxy server’s address;
- Port — the port;
- Username — the login;
- Password — the password.
- Save the profile.
For example, if your provider gave you a SOCKS5 proxy, the parameters might look like this:
- Type: SOCKS5
- Host: gate.nodemaven.com
- Port: 1080
- Username: your_username
- Password: your_password
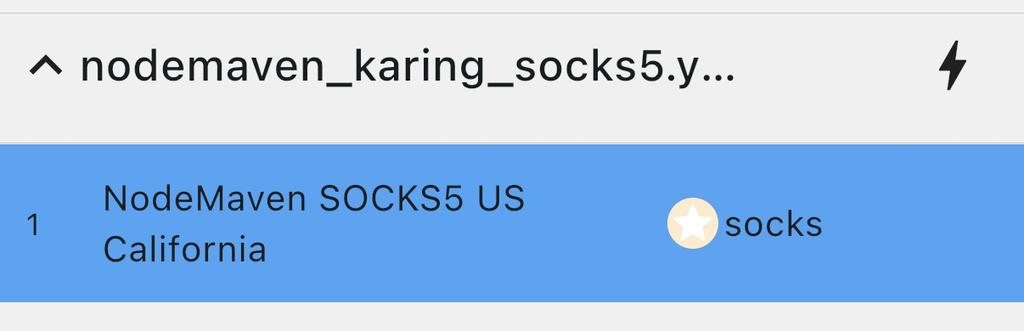
Once saved, the profile will appear in the configuration list.
If Custom doesn’t work
If the app crashes after you tap Custom, the form doesn’t open, or it won’t let you save the profile, try the second method.
This can depend on the specific version of Karing. That’s why it’s worth checking Custom first, but if you run into problems, it’s easier to just use a ready-made YAML file.
Method 2: Import a proxy via YAML
If Custom doesn’t work, you can add the proxy through a configuration file instead.
To do this, create a YAML file with your proxy’s parameters. For example:
Replace server, port, username, and password with your own proxy’s details.
Then:
- Save the file with a .yaml extension.
- Open Add Profile in Karing.
- Select Import Profile File.
- Choose the YAML file.
- Import the configuration.
- Select the profile you just added.
- Turn the connection on.
If Custom starts working again after a Karing update, you won’t need YAML anymore — in that case, it’s simpler to add a standalone proxy directly through Custom.
Once imported, the configuration will appear in the profile list.
How to use NodeMaven ISP proxies in Karing
Karing is only responsible for what happens on your device: it takes the connection parameters and routes your traffic through them. Which IP address you actually get depends on the proxy server you connect to.
We recommend NodeMaven ISP proxies. These are dedicated IP addresses reserved for you for 30 or 90 days, with HTTP and SOCKS5 support. Karing handles the client side, while NodeMaven handles the server side you’re connecting to.
The process is simple:
- In your NodeMaven dashboard, you get the ISP proxy parameters — address, port, username, and password (or you can bind access by IP without a password).
- Use this data to put together a connection as described above.
- Enter it into Karing following the instructions.
- Save the profile and turn it on.
- Once the profile is added, tap the connect button on Karing’s main screen. The status icon should switch to “connected.”
How to check that Karing is working
The most reliable way is to check which IP address a website sees after you connect. If it’s different from your real address and matches the proxy’s country, everything is working.
You can use NodeMaven’s IP lookup tool for this — it shows the country, provider, and other details of your current address, no sign-up required.
Check your IP both before and after connecting. If the address hasn’t changed, the profile in Karing isn’t active, or the connection didn’t go through.
Karing not working: what to check
If nothing happens after you turn on the connection, or websites won’t load, start with these causes:
- Wrong proxy address. Check the host for typos and extra spaces.
- Wrong port. A single incorrect character can block the connection.
- Incorrect username or password. Double-check the credentials your proxy provider gave you.
- Wrong method used to add it. A standalone HTTP or SOCKS5 proxy with host, port, username, and password parameters shouldn’t be added as a regular link through Add Profile Link.
- Custom isn’t working. Try updating Karing. If the problem persists, import the proxy via YAML using Import Profile File.
- Internet issues. Make sure the internet works on your device without Karing.
Set up Karing with a reliable proxy
Get stable ISP IPs from your target location with NodeMaven.


