
Как интегрировать прокси в Zapier



Zapier — это платформа автоматизации. Она связывает приложения и запускает действия между ними без написания кода. «Zap» — это рабочий процесс: его запускает триггер, после чего выполняется одно или несколько действий.
Большинству Zap-ов прокси не нужен. Для связки Gmail и Slack он не нужен. Для Google Sheets и вашей CRM тоже. И для отправки письма по новой заявке из формы он тоже не потребуется.
Прокси становится полезен в более узком случае: когда Zap должен отправить произвольный HTTP-запрос, и этот запрос должен уходить из Zapier через определённый IP-адрес или локацию.
В этом руководстве разбирается реальная настройка. Мы подключили HTTP-прокси NodeMaven к Zap с помощью Code by Zapier и Python, протестировали, столкнулись с ошибкой, исправили её и получили рабочий запрос. Ниже — ровно то, как мы это сделали, включая допущенную ошибку.

Подключите Zapier к надёжным прокси. Попробуйте NodeMaven от $3.50 и получите 750MB трафика
Нужен ли вам прокси для Zapier?
Для большинства рабочих процессов ответ — нет.
Обычные Zap просто передают данные между приложениями:
- Gmail → Slack
- Google Sheets → CRM
- Новая отправка формы → письмо
Ничему из этого прокси не нужен. Zapier сам обрабатывает аутентификацию и подключение к каждому приложению.
Прокси может пригодиться, когда вашему Zap нужно отправить исходящий HTTP-запрос и при этом важны исходный IP или местоположение этого запроса. Несколько примеров:
- Проверка гео-зависимой версии сайта.
- Отправка автоматических HTTP-запросов, когда исходный IP важен для целевого сервиса.
- Проверка того, как локализованная страница отображается для конкретной страны.
- Некоторые сценарии сбора веб-данных с публичных страниц.
- Распределение запросов по нескольким IP вместо отправки всего с одного адреса.
Как Zapier работает вместе с прокси
Полезно разделять две вещи: сам Zap и сетевой запрос, выполняемый внутри одного из его шагов.
Zap — это последовательность шагов-триггеров и шагов-действий. Zapier подключается к API каждого приложения напрямую. Единого переключателя «использовать прокси для этого Zap», который действовал бы на все шаги, не существует.
Если вы хотите пропустить через прокси один конкретный запрос, вам нужен шаг, позволяющий напрямую управлять HTTP-соединением. Именно это и даёт Code by Zapier когда вы сами пишете запрос на Python.
Архитектура для этого руководства выглядит так:
Прокси используется вызовом requests внутри кода на Python. Он не применяется ни к одному другому шагу в Zap. Если после шага Code вы добавите второе действие, которое напрямую обращается к другому приложению, это действие не будет проходить через прокси.
Ещё один момент, который стоит прояснить: Точка подключения NodeMaven — это прокси, а не API. Вы не обращаетесь к API NodeMaven за данными. Вы направляете обычный HTTP-запрос на адрес шлюза NodeMaven — так же, как направляли бы его на любой другой прокси-сервер.
Почему бы просто не использовать вебхуки Zapier?
Webhooks by Zapier позволяет Zapier отправлять HTTP-запрос как триггер или как действие. Поддерживаются GET, POST, PUT и Custom Request. Вы можете задать заголовки, тело запроса и Basic Auth.
Чего в нём нет, так это общих полей Proxy Host, Proxy Port, Proxy Username и Proxy Password. В Webhooks by Zapier нет настройки, которая направляла бы запрос через прокси-сервер. Basic Auth в Webhooks by Zapier выполняет аутентификацию на целевом API, а не на прокси перед ним.
Именно поэтому в этом руководстве используется Code by Zapier Шаг с кодом на Python позволяет вам самостоятельно настроить подключение через прокси с помощью библиотеки запросы , которая уже доступна в этой среде.
Что вам понадобится
- Аккаунт Zapier. Функция подключения пакетов в Code by Zapier требует платного тарифа, но используемая здесь встроенная библиотека requests работает без установки внешних пакетов.
- Аккаунт NodeMaven с доступом к резидентным, мобильным и ISP прокси.
- Ваши данные NodeMaven: хост, порт, имя пользователя и пароль прокси.
- Целевой URL для проверки.
- Code by Zapier, с использованием опции Run Python.
В этом руководстве используется HTTP-прокси, а не SOCKS5. Среда Python в Code by Zapier запускает requests, а requests поддерживает HTTP-прокси без дополнительной настройки.
Нужны прокси для ваших сценариев в Zapier? Начните с NodeMaven от $3.50 и получите 750MB трафика
Пошагово: настройка прокси NodeMaven в Zapier
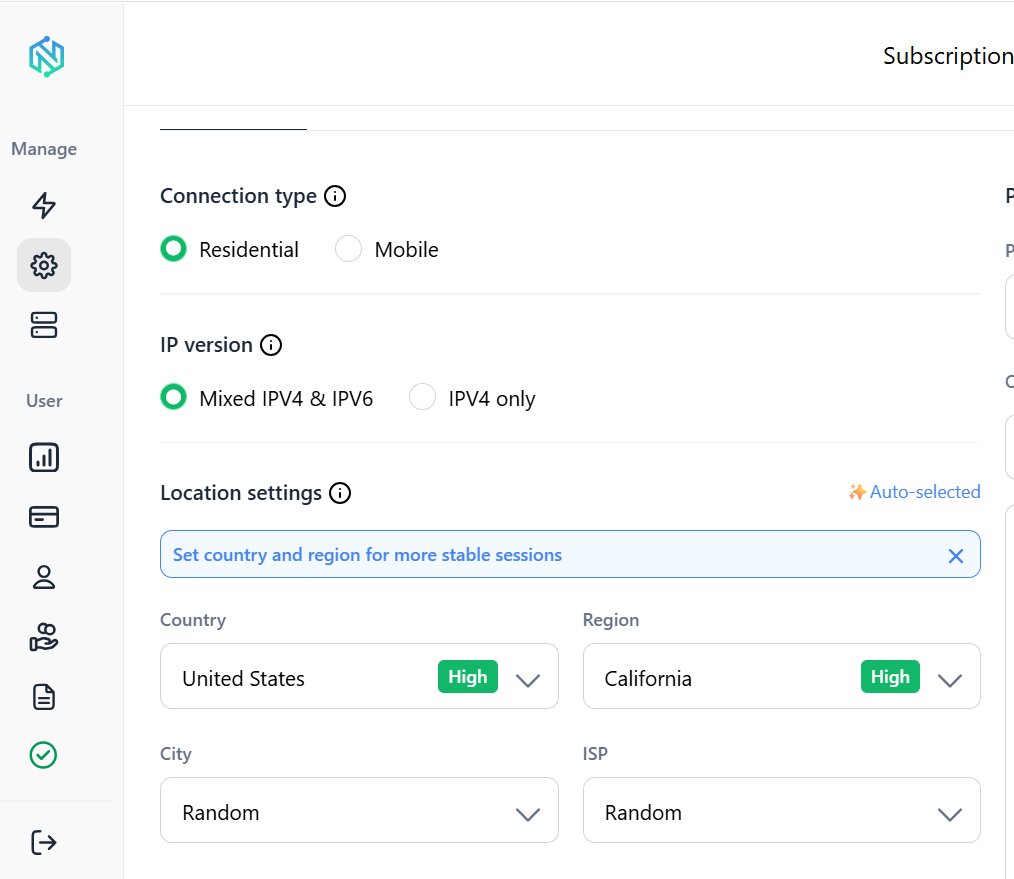
Шаг 1. Получите данные прокси NodeMaven
Войдите в панель управления NodeMaven и откройте раздел настройки прокси. Вам понадобятся четыре значения:
| Поле | Значение, используемое в этом тесте |
| Хост | gate.nodemaven.com |
| Порт | 8080 (HTTP) |
| Имя пользователя | Ваше имя пользователя прокси NodeMaven |
| Пароль | Ваш пароль прокси NodeMaven |
Имя пользователя NodeMaven может содержать не только идентификатор вашего аккаунта. В зависимости от настроек в панели управления в него также могут быть закодированы страна, регион, город, ID сессии и параметры фильтра качества IP. Так устроена работа аутентификации прокси NodeMaven: вместо отдельных полей для локации и сессии эти параметры задаются прямо в строке имени пользователя.
Если вы настраиваете это впервые, руководство NodeMaven по использованию резидентных прокси подробно объясняет, как сформировать имя пользователя с параметрами локации и сессии в панели управления.
Шаг 2. Создайте Zap
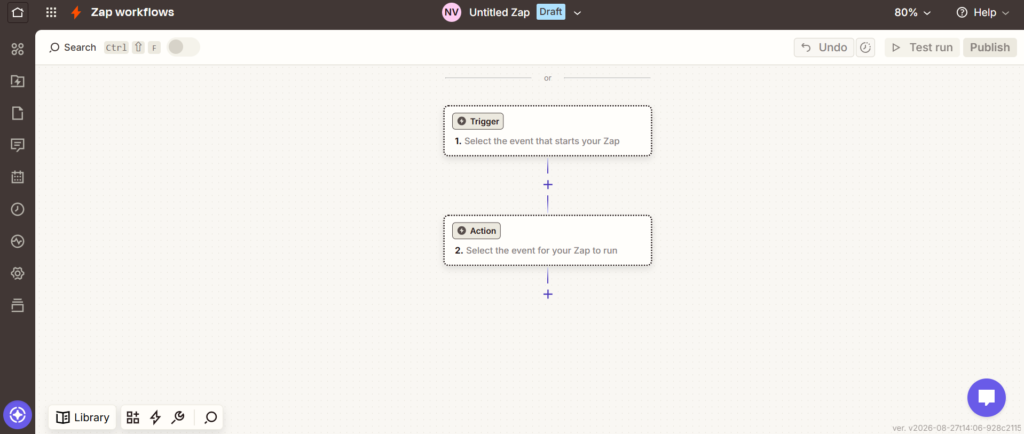
В панели управления Zapier:
- Нажмите Создать.
- Выберите Zap.
- В качестве триггера найдите Schedule by Zapier.
- Выберите Every Hour.
Schedule by Zapier используется здесь только как простой повторяемый триггер для тестирования. В реальном сценарии вы замените его на то, что действительно запускает автоматизацию: новая строка в Google Sheets, новая отправка формы, метка в Gmail или любой другой источник, который поддерживает Zapier.
Шаг 3. Добавьте Code by Zapier
Для шага действия:
- Нажмите Действие.
- Поиск Code by Zapier.
- Выберите Run Python.
Code by Zapier используется здесь потому, что у Webhooks by Zapier, как описано выше, нет настроек прокси. Code by Zapier позволяет написать Python-скрипт, который сам формирует и отправляет HTTP-запрос, включая подключение через прокси.
Учитывайте пару текущих ограничений Code by Zapier. В окружении Python уже доступны стандартная библиотека, requests и BeautifulSoup Добавить другие сторонние пакеты из PyPI можно, но для этого нужен платный тариф Zapier.
Zapier также рекомендует создать собственное приложение на своей платформе для разработчиков, если сценарию нужно отправлять больше пары HTTP-запросов или выполнять более сложные аутентифицированные вызовы API.
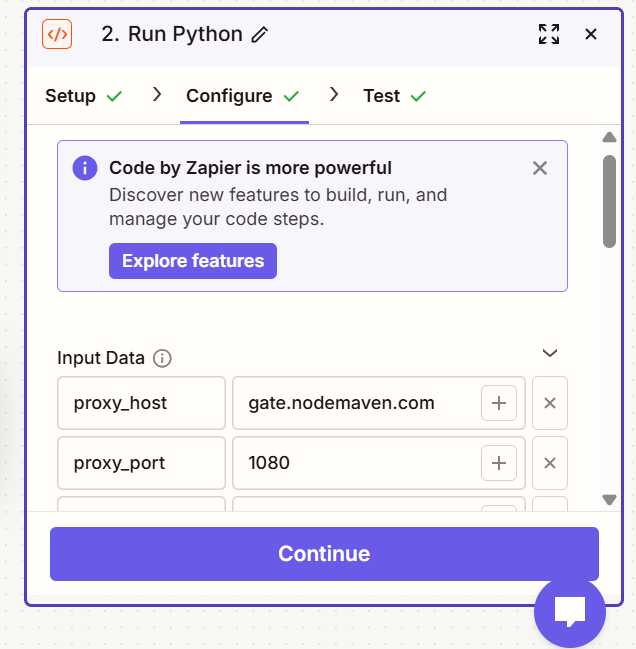
Шаг 4. Добавьте данные прокси во входные данные
В Настроить добавьте в разделе четыре Input Data поля:
| Ключ | Пример значения |
| proxy_host | gate.nodemaven.com |
| proxy_port | 8080 |
| proxy_username | ваше имя пользователя NodeMaven |
| proxy_password | ваш пароль NodeMaven |
Шаг 5. Добавьте код на Python
Вот доработанная версия кода, который мы использовали для проверки подключения:
Несколько моментов, на которые стоит обратить внимание:
- Строка прокси соответствует стандартному формату protocol://username:password@host:port format that запросы ожидает для прокси.
- Один и тот же URL прокси передаётся и для «http», и для «https» в словаре прокси Это указывает запросы направлять и обычный HTTP-, и HTTPS-трафик через один шлюз NodeMaven.
- Зона тайм-аут аргумент важен. Соединения через прокси могут быть медленнее прямого запроса, а у шагов Code by Zapier есть собственные лимиты времени выполнения, поэтому запрос без таймаута может зависнуть, пока Zapier его не прервёт.
- api.ipify.org это простая точка проверки IP. Она возвращает публичный IP-адрес, с которого пришёл запрос, в формате JSON. Она не относится ни к NodeMaven, ни к Zapier и используется здесь только для подтверждения того, что запрос ушёл через прокси.
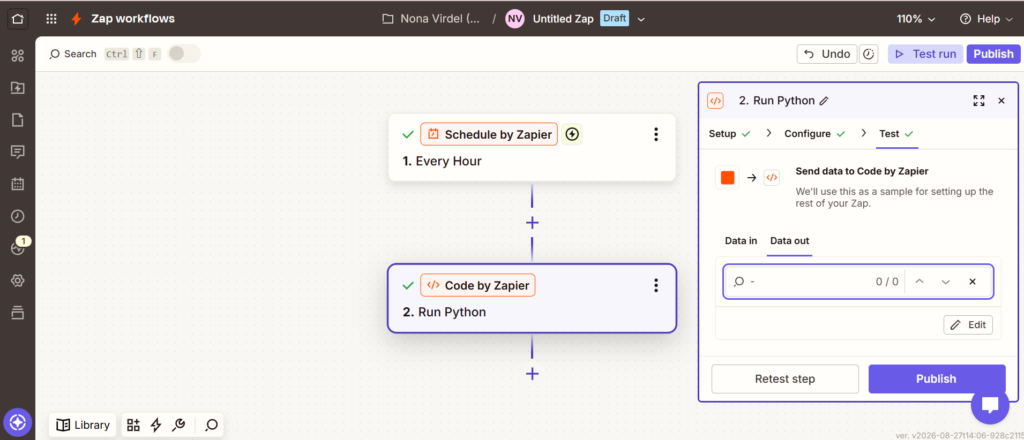
Шаг 6. Протестируйте Zap
Нажмите Продолжить, затем запустите тест для шага Code by Zapier.
В нашем тесте шаг Code выполнился успешно. Редактор Zapier показал успешный статус теста для этого шага.
Что можно автоматизировать с прокси в Zapier?
- Проверка страниц по гео Посмотрите, как выглядит страница при запросе из конкретной страны.
- Мониторинг цен Собирайте данные о ценах с публичной страницы по расписанию.
- Автоматический сбор данных по HTTP Получайте структурированные данные с эндпоинта, который отвечает по-разному в зависимости от региона.
- Проверка локализованного контента Убедитесь, что региональные редиректы и варианты контента работают как задумано.
- Передача URL из Google Sheets в пользовательский HTTP-запрос Пройдите по списку URL и запросите каждый из них через прокси.
- Запуск запроса через прокси после отправки формы Запускайте проверку или поиск сразу после поступления новых данных.
Если вы собираете данные в сколько-нибудь заметных объёмах для анализа, руководство NodeMaven по веб-скрапингу на Python описывает более широкую настройку за пределами одного шага в Zapier, включая контроль частоты запросов и работу с сессиями.
Автоматизируете HTTP-запросы в Zapier? Попробуйте прокси NodeMaven от $3.50 с 750MB трафика
Ротационные и статичные прокси в Zapier
NodeMaven поддерживает два типа сессий.
- Ротационный прокси: для каждого запроса может использоваться новый IP. Подходит для независимых разовых запросов, где связь между ними не важна.
- Sticky-прокси: один и тот же IP сохраняется в течение заданной сессии. Подходит, когда цепочка запросов должна выглядеть единообразно, поскольку sticky-сессии NodeMaven удерживают IP до 24 часов.
Для Zap по расписанию, который срабатывает раз в час и делает один запрос, ротации обычно достаточно.
Если несколько связанных запросов должны выглядеть исходящими из одного места, лучше подойдут sticky-сессии.
Лучшие практики использования прокси с Zapier
- Совпадение протокола прокси и порта Как показано выше, это самая частая причина сбоев.
- Храните учетные данные в Input Data полях, а не в жестко прописанном виде в скрипте.
- Используйте тип прокси, подходящий для задачи. Резидентные IP ведут себя иначе, чем серверные IP, на большинстве целевых сайтов.
- Не меняйте IP чаще, чем этого требует задача. Лишняя ротация ничего не дает и может усложнить отладку.
- Соблюдайте условия целевого сайта или API и лимиты запросов.
- Всегда задайте тайм-аут для запроса.
- Проверьте подключение через прокси отдельно, прежде чем встраивать его в более крупный Zap. Инструмент NodeMaven бесплатный чекер прокси — это быстрый способ убедиться, что связка хоста, порта и учетных данных работает, еще до того как вы вообще откроете Zapier.
Вся эта схема работает на стороне сервера, внутри Python-песочницы Zapier. Браузер здесь не используется, поэтому специфичные для браузера проблемы вроде утечек IP через WebRTC тут неактуальны.
Альтернатива: использовать промежуточный сервис
Есть и вторая, более гибкая архитектура для случаев, когда возможностей Code by Zapier недостаточно:
Здесь Zapier обращается к вашему собственному серверу через Webhooks by Zapier, а сервер уже обрабатывает подключение через прокси, повторные попытки и любую пользовательскую логику. Это оправдано для сценариев со сложной логикой, несколькими запросами за запуск или обработкой, выходящей за рамки того, что стоит делать в одном шаге Code.
Заключительные мысли
Обычно Zapier не требует прокси. Большинство автоматизаций просто передают данные между приложениями и никогда не работают с «сырым» HTTP-запросом. Но когда сценарию нужно отправить пользовательский запрос через конкретный IP или локацию, Code by Zapier дает простой способ сделать это обычным Python- запросы вызов.
Если вам нужен прокси для сценариев Zapier, NodeMaven предоставляет HTTP- и SOCKS5 прокси с настройкой локации и сессий из личного кабинета под разные задачи автоматизации.
Добавьте надежные прокси-IP в свои сценарии Zapier. Попробуйте NodeMaven от $3.50 и получите 750MB трафика


