How to set up a proxy on iPhone (Step-by-step guide)

Learning how to set up a proxy on iPhone can improve privacy, help manage multiple accounts, and give access to geo-restricted content.
Whether you want to set up an HTTP proxy on iPhone, connect through a SOCKS5 proxy, or configure a proxy server for testing and automation, iOS makes the process straightforward. This guide shows how to set up a proxy on iPhone manually or automatically in just a few minutes.
What is an iPhone proxy?
Before you set up a proxy on iPhone, it’s important to understand how it works.
An iPhone proxy acts as a bridge between your device and the websites or apps you visit. Instead of connecting directly, your traffic is first sent through a proxy server, which changes your visible IP address and location.
This adds privacy, helps you appear from different regions, and keeps your browsing safe — especially when using public Wi-Fi or managing multiple online accounts.
That means the site sees the proxy’s IP address instead of your own. This helps with:
- Privacy: Hiding your real location and IP
- Geo-targeting: Accessing content or stores available only in certain countries
- Automation: Running app tests or multiple logins safely
- Security: Protecting your personal data on public Wi-Fi
Set up a proxy on iPhone with premium residential IPs. Get 750MB trial traffic for just $3.50
How to set up a proxy server on iPhone (Manual setup)
If you prefer full control over your connection, you can manually configure your proxy in iPhone settings.
This option lets you enter your own server address, port, and login details. It’s perfect when you have a dedicated or static proxy from a provider like NodeMaven and want to connect directly without extra software.
Follow the steps below to manually add a proxy on your iPhone.
1. Open Wi-Fi Settings
Go to Settings → Wi-Fi and tap the “i” icon next to your connected Wi-Fi network.
2. Scroll to the Proxy Section
At the bottom of the screen, you’ll see “HTTP Proxy”. This is where iOS allows you to configure an HTTP proxy on iPhone for the selected Wi-Fi network.
Tap it to open three options: Off, Manual, and Auto.

3. Choose “Manual”
Select Manual to enter your proxy details manually.
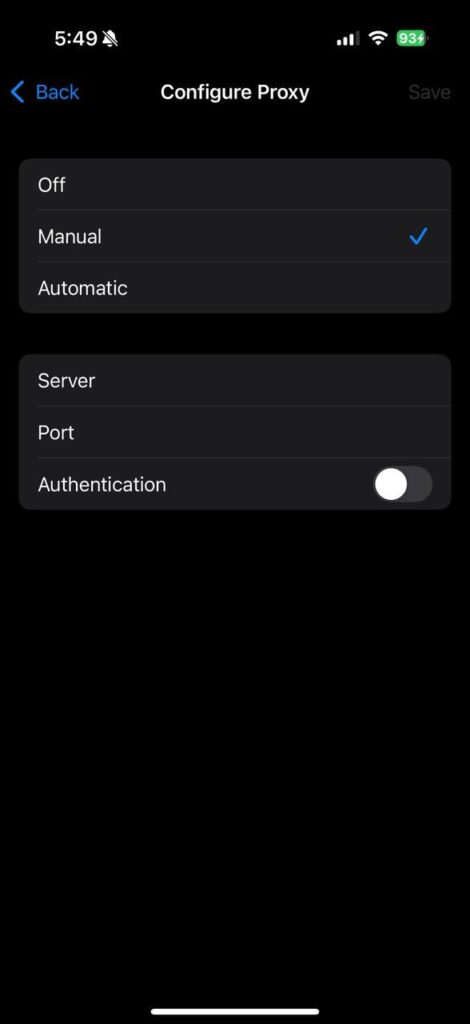
4. Enter Proxy Details
Fill in the fields provided:
- Server: The IP address of your proxy (e.g., 45.83.19.22)
- Port: The proxy port (e.g., 8000 or 8080)
- Username/Password: (Optional) If your proxy provider requires authentication
Make sure all details match exactly as provided by your proxy provider (for example, NodeMaven).
5. Save and Test the Connection
Tap Save or simply go back. Then open Safari and visit any site to check if your proxy is working.
You can confirm your new IP by visiting whatismyipaddress.com.
Configure your iPhone proxy in minutes with real residential IPs. 750MB trial included for $3.50
How to set up a proxy on iPhone (Automatic setup with PAC URL)
Some proxy providers — including NodeMaven — let you connect automatically using a PAC (Proxy Auto-Configuration) URL.
This setup method is faster and easier because your iPhone automatically loads the correct server and port settings from the PAC file. It’s ideal if you use rotating proxies or switch between multiple proxy pools.
Here’s how to configure your iPhone proxy automatically using a PAC URL.
1. Open Wi-Fi Settings
Go to Settings → Wi-Fi → “i” icon next to your network.
2. Scroll to the Proxy Section
Under HTTP Proxy, choose Auto.
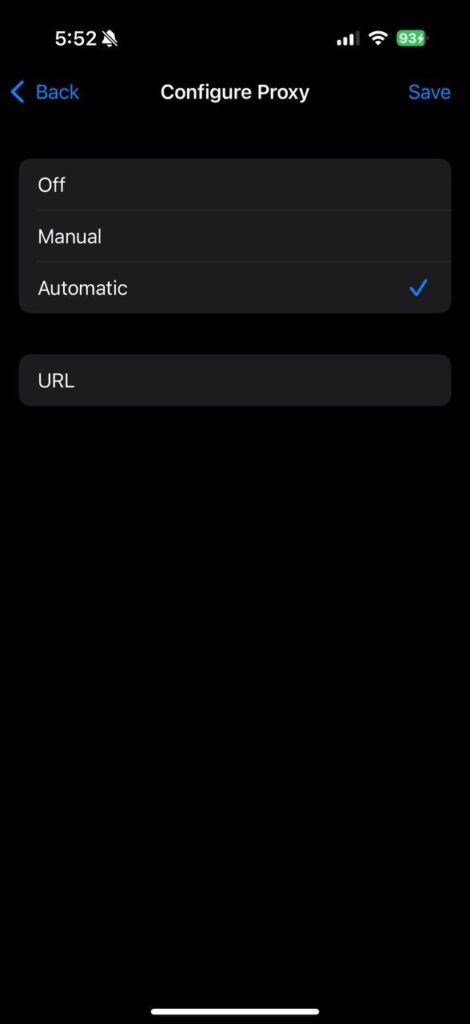
3. Enter URL
In the URL field, enter the PAC URL given by your proxy provider (for example, https://proxy.nodemaven.com/pac).
4. Save and Test Connection
Tap Save or exit the menu to apply changes.
This method automatically fetches the correct proxy IP and port settings — perfect for large proxy pools or rotating proxies.
Bonus: Using Mobile Proxies with iPhone Hotspot
Did you know you can share your iPhone’s mobile connection as a proxy hotspot?
By connecting your NodeMaven mobile proxy to your phone, you can extend that secure IP to other devices like laptops or tablets. This is especially useful for digital marketers, app testers, or anyone managing accounts that need real mobile IPs with high trust scores.
Let’s look at how you can use your iPhone hotspot together with mobile proxies.
Need a reliable iPhone proxy? Get clean residential and mobile IPs — 750MB trial for $3.50
How to set up SOCKS5 proxy on iPhone
Unlike HTTP proxies, iOS doesn’t offer built-in SOCKS5 configuration through the Wi-Fi settings menu. To use a SOCKS5 proxy on iPhone, you’ll need a third-party proxy client app such as Happ.
Here’s how to set up a SOCKS5 proxy on iPhone using Happ, but this guide is also suitable for all proxy clients.
1. Install Happ
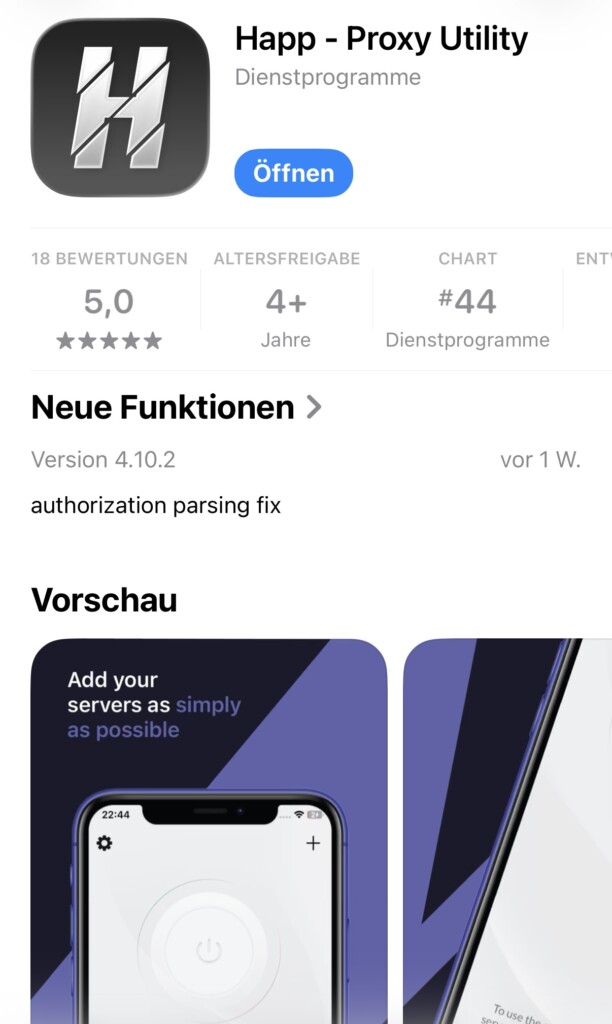
Download and install the Happ proxy client from the App Store.
Once installed, open the app and allow any required permissions.
2. Create a new proxy profile
Inside Happ, tap “+” button in the right upper corner
Then, press “Manual input”
3. Enter your proxy details
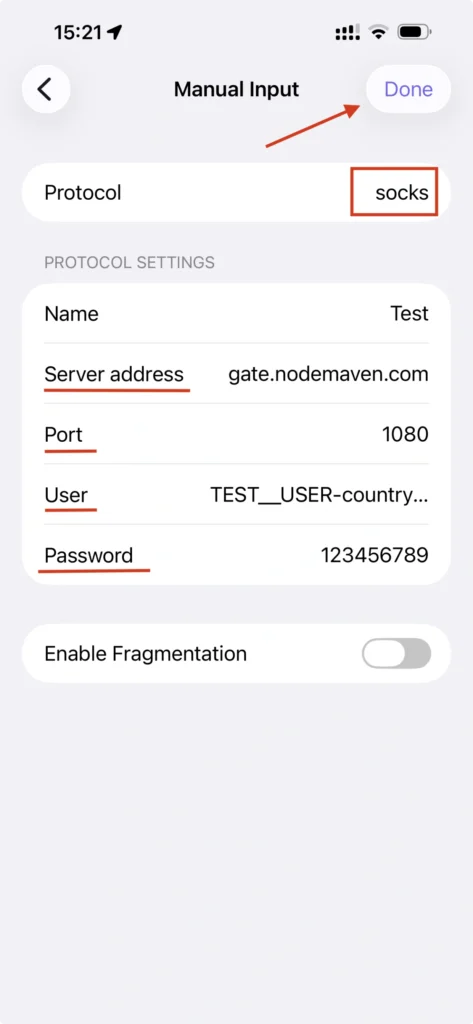
Choose “Socks” protocol and fill in the credentials provided by your proxy provider:
Server address: Your SOCKS5 proxy IP address or hostname
Port: Your SOCKS5 port number
Username: Your proxy username (if required)
Password: Your proxy password (if required)
For example, if you’re using NodeMaven, you’ll find these details in your dashboard.
4. Save and connect
Save the profile with “Done” button and enable the connection.
Happ will create a local VPN configuration on your iPhone to route traffic through the SOCKS5 proxy. This is normal and required for proxy routing on iOS.
5. Verify your new IP address
Open Safari and visit an IP-checking website to confirm that your traffic is being routed through the proxy.
If the displayed IP matches your proxy location, the setup was successful.
Why use a SOCKS5 proxy on iPhone?
SOCKS5 proxies are popular because they:
- Support more traffic types than standard HTTP proxies
- Work well with automation and account management tools
- Offer flexible routing for apps and browsers
- Can provide better compatibility for advanced proxy use cases
If your provider offers both HTTP(S) and SOCKS5 endpoints, HTTP proxy setup remains the simplest option for everyday browsing. However, SOCKS5 is often preferred by users who need greater flexibility, broader application support, or advanced proxy configurations on iPhone.
Tips for the best iPhone proxy experience
Using a proxy is easy, but using it effectively takes a few best practices. The right settings, proxy type, and habits will help you stay fast, secure, and undetectable across all your apps.
Whether you’re scraping data, managing accounts, or shopping online, these tips will make sure your proxy connection always performs at its best.
Keep these recommendations in mind to get the most from your iPhone proxy setup.
- Use residential or mobile Proxies for the highest trust score and lowest detection risk.
- Avoid public or free proxies. They’re often slow, unsafe, or blacklisted.
- Combine your proxy with an anti-detect browser like Dolphin Anty for full fingerprint protection.
- If you switch between Wi-Fi networks, re-check your proxy settings, because iOS stores them per network.
- To disable the proxy, go back to the HTTP Proxy section and select Off.
Why use NodeMaven proxies on iPhone?
Not all proxies are created equal — and using low-quality ones can lead to blocks, slow speeds, or security risks.
NodeMaven solves this by offering real mobile and residential IPs that blend perfectly with genuine traffic. Designed for simplicity and stealth, they’re easy to configure on any iPhone and compatible with all major browsers and apps.
Here’s what makes NodeMaven proxies stand out for iPhone users.
- Real IPs from real devices (not datacenter servers)
- Super-sticky sessions up to 7 days
- Geo-targeting by city or country
- Easy configuration with HTTP(S) and SOCKS5 support
Whether you’re shopping online, managing multiple accounts, or testing mobile apps, NodeMaven makes proxy setup on iPhone simple, safe, and reliable.
Final thoughts
Setting up an iPhone proxy only takes a minute — but it gives you full control over your online privacy, location, and automation workflow.
For the best results, use clean IPs from NodeMaven.com — and you’ll browse, buy, and build online with total freedom.
Connect your iPhone to real residential proxies and avoid blocks. Try 750MB for just $3.50


