Chrome proxy settings control how your browser connects to the internet through a proxy server instead of directly through your local network. People use proxies in Chrome for many reasons such as testing websites from different locations, managing multiple sessions, or running browser-based automation tasks.
In this guide, you’ll learn how to change proxy settings in Google Chrome, add a proxy server, and switch between proxies using browser extensions. We’ll demonstrate the setup using NodeMaven proxies, where clean, high-quality IPs help ensure stable Chrome connections.
How to Set and Change Proxy Settings Using the Chrome Simple Proxy Switcher Extension
If you often switch proxy servers in Chrome, using a Chrome proxy extension is usually the easiest option. Instead of opening system network settings every time, the extension allows you to set and change proxy settings directly inside the browser.
One commonly used tool is Simple Proxy Switcher in the Chrome Web Store. This Google Chrome proxy extension lets you add proxy profiles, enable or disable them, and quickly switch between different proxy connections.
Install the Chrome Simple Proxy Switcher Extension
First, install the extension from the Chrome Web Store.
- Open the Chrome Web Store
- Search for Simple Proxy Switcher.
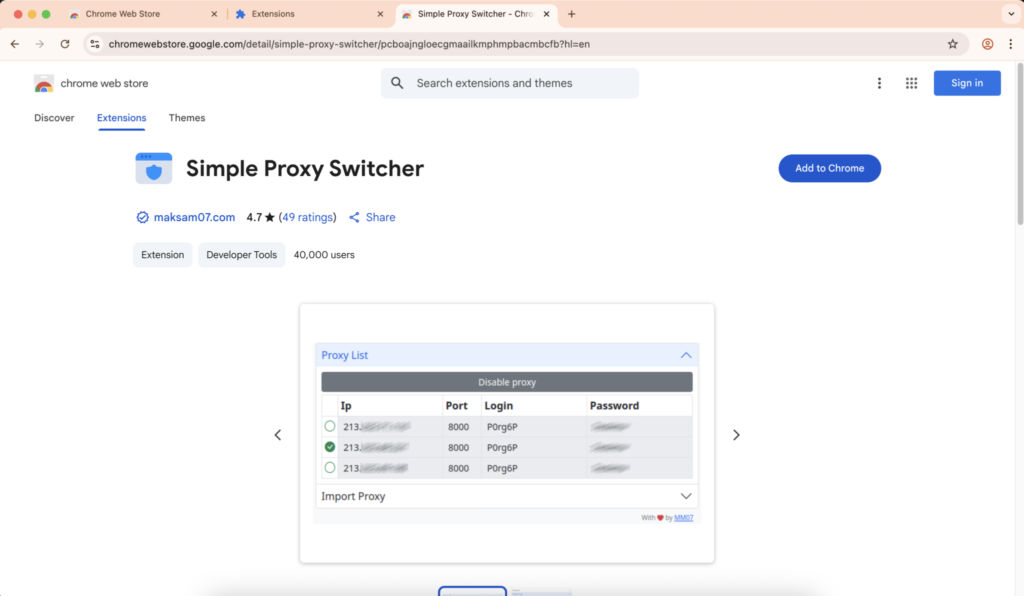
- Click Add to Chrome
- Confirm the installation
After installation, the extension icon will appear in the Chrome toolbar. From there, you can manage your proxy server in Chrome without opening system proxy settings.
Add a Proxy Server to Chrome
After installing the extension, you can add your proxy configuration.
- Click the Simple Proxy Switcher icon in Chrome
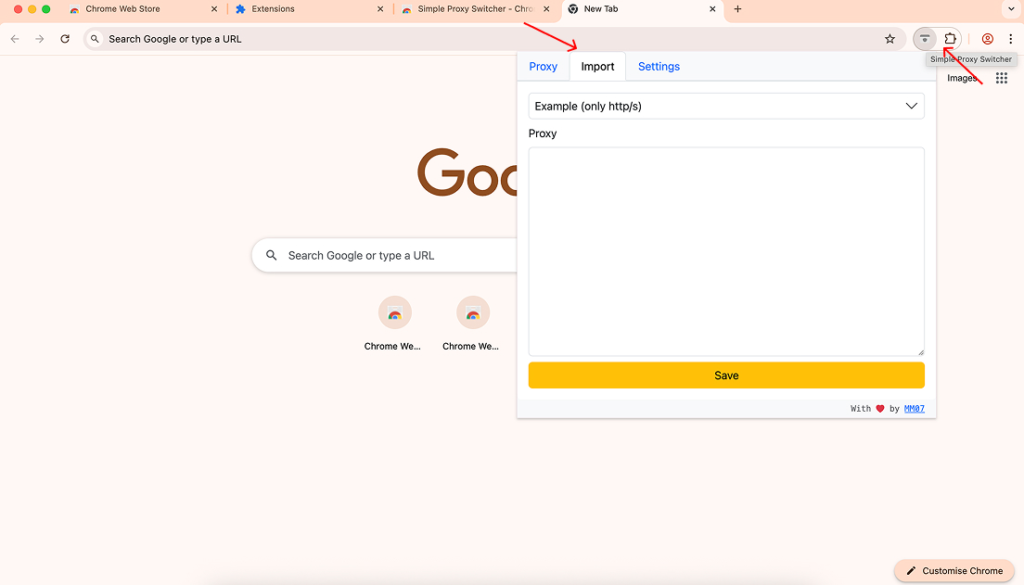
- Open the Import tab
- Generate your proxy configuration in the NodeMaven dashboard
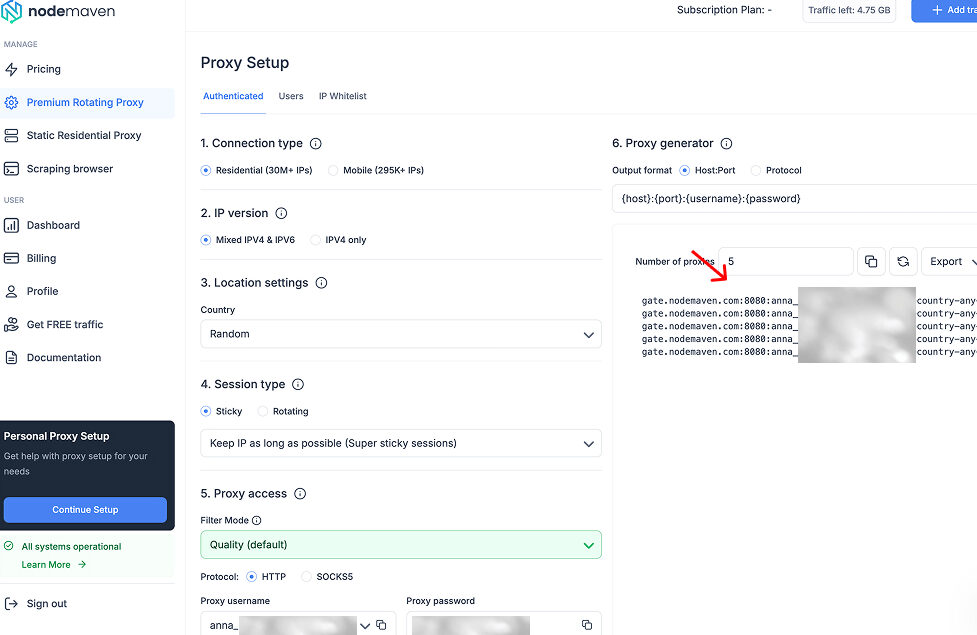
- Copy the proxy string provided there
- Paste it into the extension
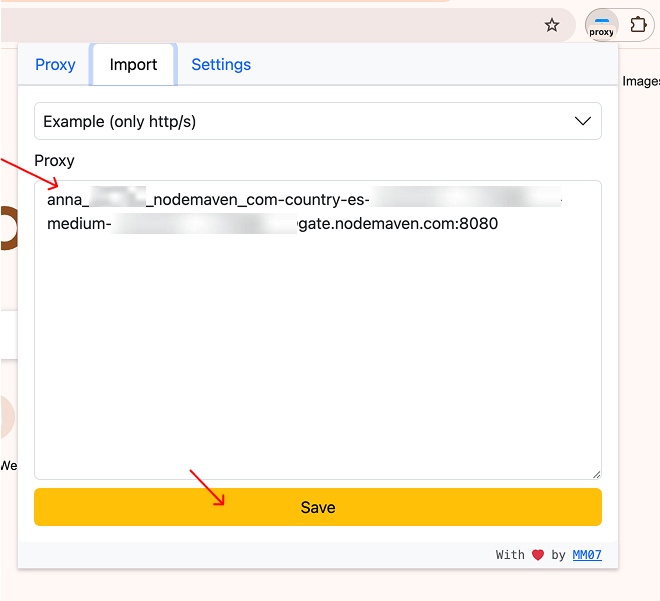
- Click Save
- Go to the Proxy tab and enable your proxy
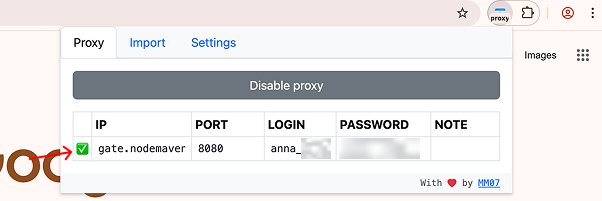
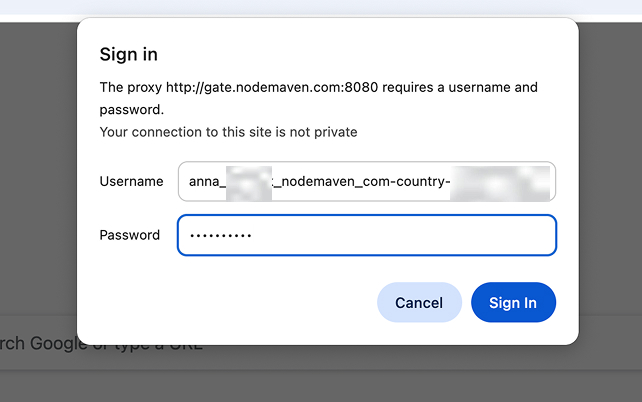
- Try to go to any website, and enter your proxy credentials to the appeared Sign in tab (Go to the NodeMaven Dashboard to copy your Proxy username and password)
- Double-check the assigned IP and location using a trusted IP-checking tool
This will add the proxy profile to your browser.
With NodeMaven proxies, starting to use Chrome with proxies is straightforward because the proxy credentials are already generated in the dashboard, and the IPs are filtered for quality and stability.
Switch Proxy Servers in Chrome
Once the proxy profile is saved, you can change proxy settings in Chrome in just a few clicks.
- Click the Simple Proxy Switcher icon
- Open the Proxy tab
- Select the proxy profile you created, or add a new proxy
- Enable the proxy
Chrome will now route traffic through the selected proxy server.
Tip: You can confirm the connection by visiting an IP checker page and verifying that your browser is using the proxy location.
How to Manually Configure Chrome Proxy Settings
You can also configure a proxy in Chrome manually. Chrome does not have its own independent proxy configuration panel. Instead, Chrome proxy settings are controlled by your operating system’s network settings. This means when you configure a proxy in your system settings, Chrome will automatically use that connection.
Step 1: Open Chrome Proxy Settings
- Open Google Chrome
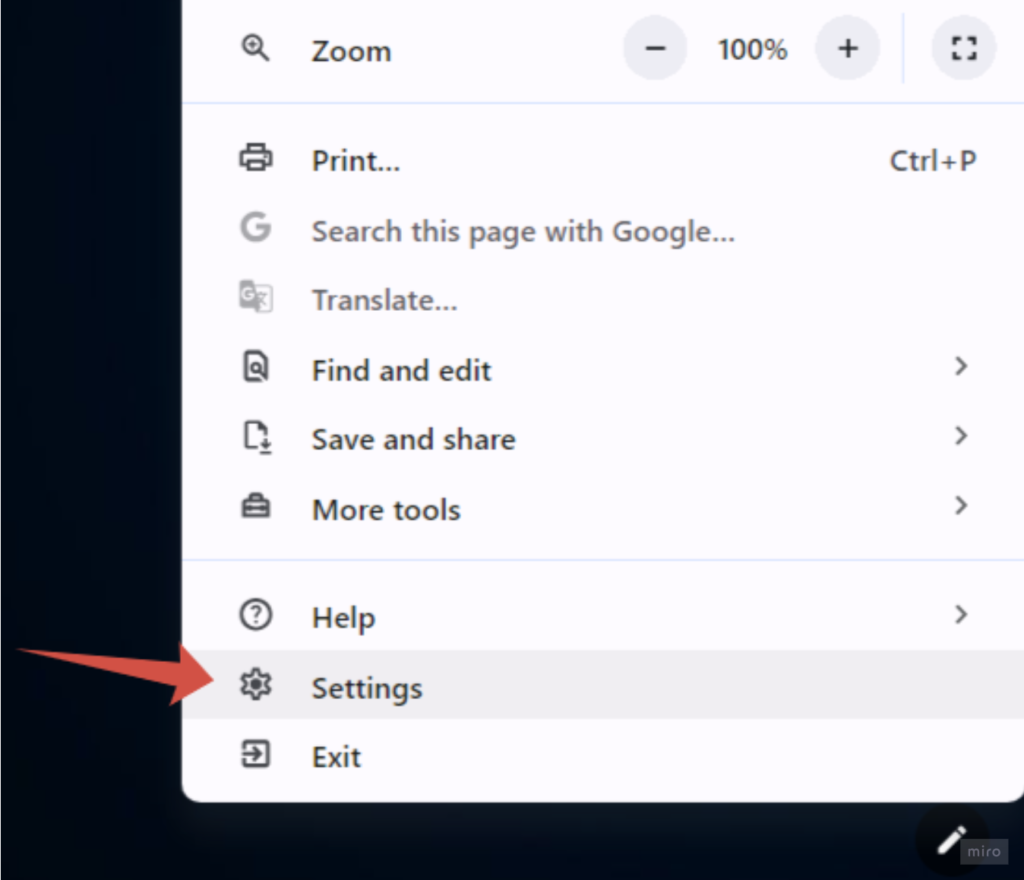
- Click the three-dot menu in the top right corner
- Select Settings
- Scroll down to the System section
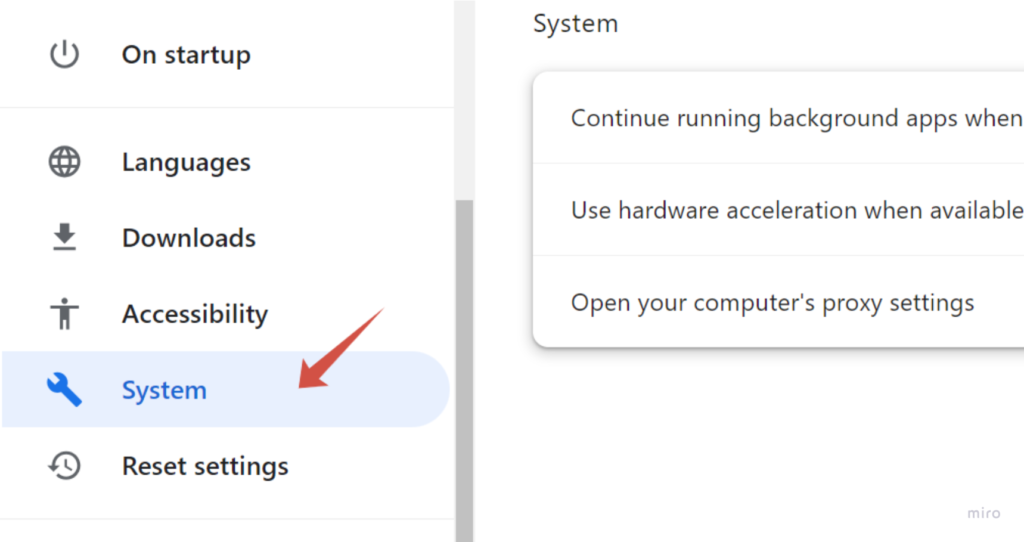
- Click Open your computer’s proxy settings
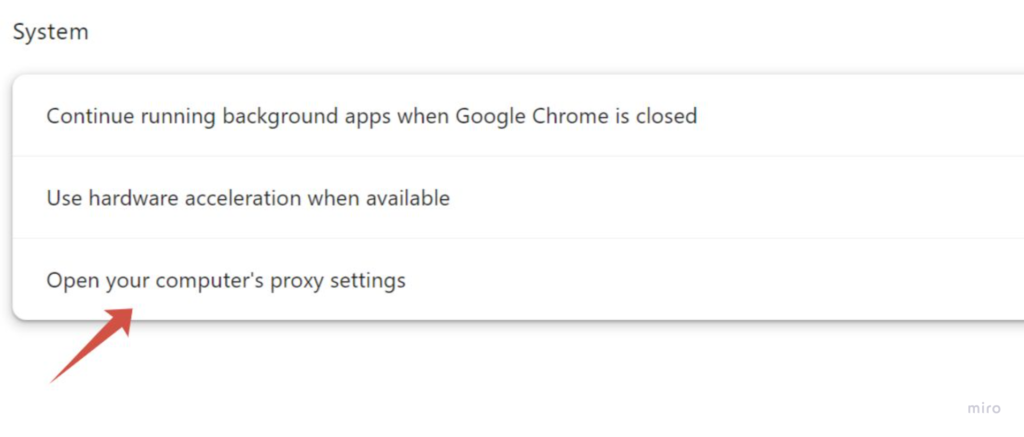
This will open the proxy configuration panel of your operating system, where you can add or change proxy settings.
Step 2: Add a Proxy Server in Chrome
Once the proxy settings window opens, you can configure your proxy connection.
On macOS
- Open Network Settings
- Select your active connection such as Wi-Fi or Ethernet
- Click Details
- Open the Proxies tab
- Choose the proxy protocol you want to use, usually SOCKS5 or HTTP
- Enter the following information:
- Proxy server address
- Port
- Username and password if authentication is required
Save the changes to apply the configuration.
On Windows
- Open Proxy settings
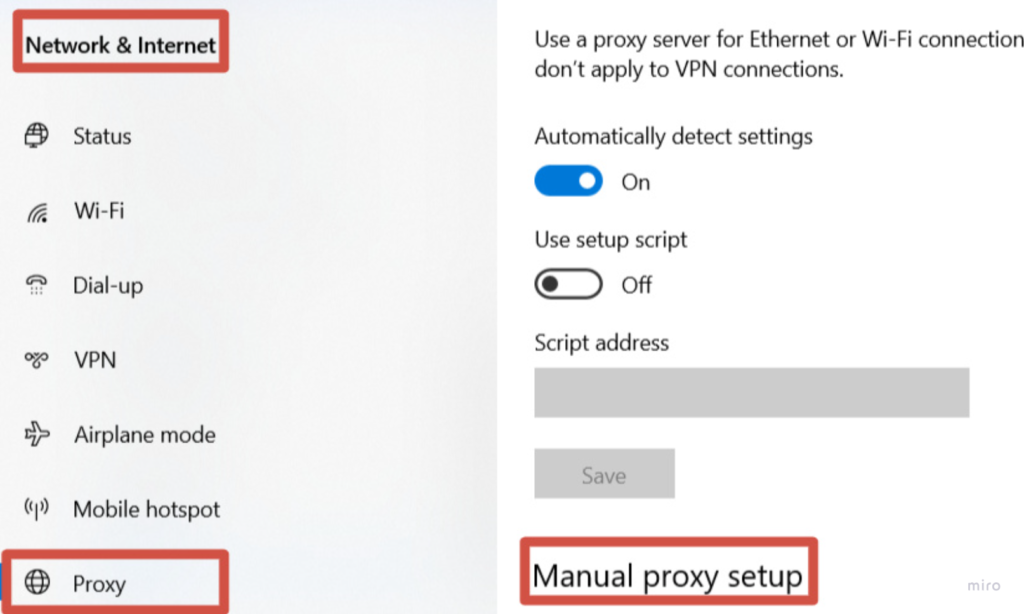
- Turn on Use a proxy server
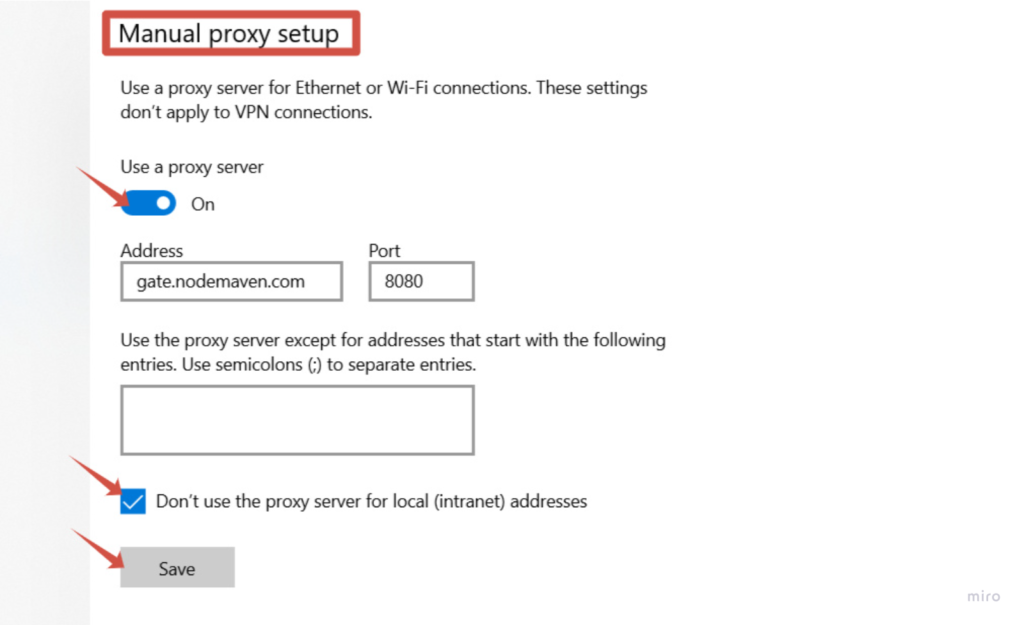
- Enter the proxy server IP address
- Enter the port number
- Save the settings
- Try to go to any website, and enter your proxy credentials to the appeared Sign in tab (Go to the NodeMaven Dashboard to copy your Proxy username and password)
After saving, Chrome will automatically route browser traffic through the configured proxy server.
Step 3: Check if the Chrome Proxy Works
To make sure the proxy is active, open a new Chrome tab and visit an IP checking website. If the setup is correct, the displayed IP address and location should match the proxy server you configured.
When Should You Use a Proxy in Chrome?
Changing Chrome proxy settings allows your browser to connect to websites through a proxy server instead of your local network. This can be useful in many situations where you need more control over your connection, location, or browser sessions.
Common cases where people use a proxy in Chrome browser include:
• Testing websites from different locations
Developers and marketers often use a proxy server in Chrome to check how websites, ads, or landing pages appear in different countries or cities.
• Running automation tools
Many browser automation workflows rely on proxies to distribute requests across different IP addresses. Setting up proxy settings in Chrome helps keep these tasks running without interruptions.
• Managing multiple sessions or accounts
If you work with several accounts or browser profiles, proxies help keep sessions separate by assigning a different IP to each connection.
• Browsing with a different IP location
Using a proxy allows your Google Chrome proxy settings to route traffic through another region, which can be useful when checking region-specific content or services.
Many users configure Chrome proxy settings for tasks such as automation workflows, regional testing, and collecting public data from websites. Using reliable proxy providers like NodeMaven makes the setup easier because their residential, mobile, and ISP proxies come with clean IPs and stable connections that work smoothly with Chrome.
Why Free Chrome Proxies Often Cause Problems
Free proxies may look convenient at first, especially if you only need a quick way to change your IP. However, many free proxy lists are unreliable and often cause problems when used with Chrome proxy settings.
Common issues with free proxies include:
• Blocked or blacklisted IP addresses
Free proxy servers are often used by thousands of people at the same time. Because of that, many of their IPs are already flagged or blocked by websites.
• Slow page loading
Public proxy servers usually have limited bandwidth and too many users connected at once, which leads to very slow browsing speeds.
• Unstable connections
Free proxies frequently go offline or disconnect without warning. This can interrupt sessions and make automation tools or browser workflows unreliable.
• Frequent CAPTCHA challenges
Since many users share the same IP address, websites may treat the traffic as suspicious and trigger additional verification steps.
Chrome works best with stable network connections, so unreliable proxies can easily disrupt normal browsing and testing workflows. Using a reliable provider like NodeMaven helps avoid these issues by offering clean residential, mobile, and ISP proxies that are filtered for quality and designed to work consistently with Chrome proxy setups.
The Most Reliable Proxy Setup for Chrome with NodeMaven
If you plan to use proxies in Chrome regularly, free proxy lists often create problems such as unstable connections, slow speeds, or blocked IPs. A high-quality proxy network provides a much more consistent experience when working with Chrome proxy settings and browser proxy extensions.
NodeMaven proxies are designed to integrate smoothly with both manual Google Chrome proxy settings and Chrome proxy extensions. This allows you to run browser workflows with stable connections and clean IP addresses.
Clean IPs Filtered for Quality
NodeMaven uses an IP Quality Filter that screens proxies before they are assigned. This helps remove flagged or unreliable IPs from the pool, which reduces connection issues and improves stability when using a proxy server in Chrome.
Multiple Proxy Types for Different Workflows
NodeMaven provides several proxy types that work well with Chrome proxy settings:
- Residential proxies for browsing, website testing, and multi-session workflows
- Mobile proxies for tasks that require mobile network traffic and higher trust signals
- ISP proxies for stable sessions with static residential IPs
This flexibility allows users to choose the right proxy type depending on their Chrome workflow.
Tip: NodeMaven offers 2-in-1 plans: access to both mobile and residential IPs with one subscription, which makes it convenient for workflows across different platforms and tasks.
Geo Targeting Across 150+ Countries
NodeMaven proxies support precise location targeting, allowing you to connect through IP addresses from 150+ countries and thousands of regions. This is useful when testing localized content, verifying ads, or running region-specific browsing sessions in Chrome.
Long Sticky Sessions for Stable Connections
NodeMaven proxies support sticky sessions up to 7 days, allowing you to keep the same IP address for longer browsing sessions. This helps maintain stability when working with Chrome proxy settings, especially for tasks that require consistent sessions such as account management, testing workflows, or browser automation.
This approach reduces session interruptions and keeps your proxy in Chrome browser stable throughout the workflow.
24/7 Expert Support for Setup and Guidance
If you need help configuring a proxy server in Chrome, NodeMaven provides 24/7 expert support. The support team can assist with proxy setup, extension configuration, and workflow guidance, helping users get their proxies running smoothly in Chrome.